Developing a Web
Application
with Spring Framework and OpenRules
Part 1 – Environment Setup and Basic Tomcat Application
This is the first part of a step-by-step account of how to develop web applications using Spring and OpenRules. This part setup an environment and create a trivial Tomcat applcation.
Prerequisites
Java SDK (using version 1.4.2)
Ant (using version 1.6.2)
Apache Tomcat (using version 5.0.28 or higher)
You should also be reasonably comfortable using the above software.
Step 1 – development directory
We are going to need a place to keep
all the source and other files we will be creating, so let's create a
directory and name it 'hello.spring'. You can place this directory in your home
folder or in some other location.
Inside this directory we create a 'src' directory to hold all Java
source files. Then we create another directory that we name 'war'. This
directory will hold everything that should go into the WAR file, that
we would use to deploy our application. All source files other than
Java source, like JSPs and configuration files, belongs in this
directory.
Step 2 – index.jsp
We will start by creating a JSP page named 'index.jsp' in the war directory. This is the entry point for our application.
| hello.spring/war/index.jsp |
<html> |
Just to have a complete web application, we create a web.xml in a WEB-INF directory that we create under the war directory.
| hello.spring/war/WEB-INF/web.xml |
<?xml version="1.0" encoding="UTF-8"?> |
Step 3 – deploying the application to Tomcat
Next, we write an Ant build script that we are going to use throughout this document. There are tasks for building and deploying the application. A separate build script contains the app server specific tasks There are also tasks for controlling the application under Tomcat.
| hello.spring/build.xml |
<?xml version="1.0"?> <!-- Add additional non-java files to WEB-INF/classes -->
<copy todir="${build.dir}">
<fileset dir="${src.dir}">
<exclude name="**/*.java"/>
</fileset>
</copy>
|
This script now
contains all the targets that we are going to need to make our
development efforts easier. We are not going to cover this script in
detail since most if not all of it is pretty much standard Ant and
Tomcat stuff. You can just copy the above build file and put it at
the root of your development directory tree. We also need a build.properties file that you should customize to match your server
installation. This file belongs in the same directory as the
build.xml file.
| hello.spring/build.properties |
# Ant properties for building the hello.spring |
For example, on Windows, if your tomcat has
been installed at c:/tomcat-5.0.28, you may define
appserver.home=c:/tomcat-5.0.28
If you are on a system where you are
not the owner of the Tomcat install, then the Tomcat owner must
either grant you full access to the webapps directory or the owner
must create a new directory named 'hello.spring' in the 'webapps'
directory of the Tomcat installation, and also give you full rights
to deploy to this newly created directory. On Linux you may run the command
chmod a+rwx hello.spring
to give everybody full rights to this directory.
If you are using a different web application server, then you can remove the Tomcat specific tasks at the end of the build script. You will have to rely on your server's hot deploy feature, or you will have to stop and start your application manually.
Now we run Ant to make sure that everything is working OK. You should have your current directory set to the 'hello.spring' directory.
Buildfile: build.xml

usage:

     [echo] helloapp build file
     [echo] -----------------------------------

     [echo] Available targets are:

     [echo] build     --> Build the application
     [echo] deploy    --> Deploy application as directory
     [echo] deploywar --> Deploy application as a WAR file
     [echo] install   --> Install application in Tomcat
     [echo] reload    --> Reload application in Tomcat
     [echo] start     --> Start Tomcat application
     [echo] stop      --> Stop Tomcat application
     [echo] list      --> List Tomcat applications


BUILD SUCCESSFUL
Total time: 2 seconds
|
Last action here is to do the actual deployment. Just run Ant and specify 'deploy' or 'deploywar' as the target.
Buildfile: build.xml build: |
To simplify the future use of OpenRules, you can make the following simple changes:
1) Added the "manager" role to the user "tomcat" to allow web application deployment. Tomcat Server allows a web application to establish connection as a Manager Application (responsible for remote Web Application deployment). So, you can add the word "manager" in file 'conf/tomcat-users.xml':
<user name="tomcat" password="tomcat" roles="tomcat,manager" />
2) Add tools.jar from j2sdk1.4.2_08/lib to your jakarta-tomcat-5.0.28/common/lib as a workaround for a notorious "no tools.jar problem". Note that the default Tomcat 5.5 does not have to deal with “no tools.jar problem”.
3) You may use the user "tomcat" by making changes in 'build.properties' file:
tomcat.manager.username=tomcat
tomcat.manager.password=tomcat
Step 4 – Test the application
Let's just quickly start Tomcat and make sure that we can access the application. Use the 'list' task from our build file to see if Tomcat has picked up the new application.
Buildfile: build.xml list: [list] /jsp-examples:running:0:/jakarta-tomcat-5.0.28/webapps/jsp-examples |
If it is not listed, use the 'install' task to get the application installed in Tomcat.
Buildfile: build.xml install: [install] OK - Installed application at context path /hello.spring BUILD SUCCESSFUL Total time: 2 seconds |
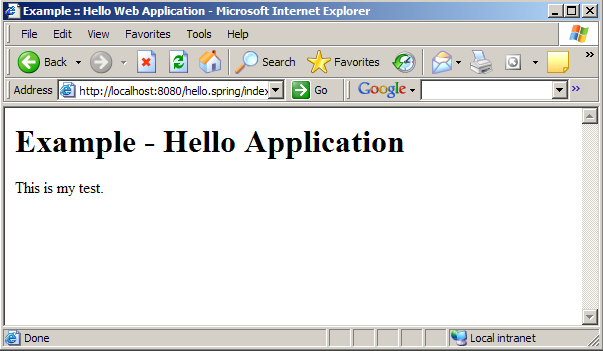
Now open a browser and browse to http://localhost:8080/hello.spring/index.jsp
Summary
We created a development environment with Ant build files.
We setup a trivial web application that is used only to test our setup.
So far, our application hello.spring is extremely basic. But the whole setup works and we are now ready to add real functionality.
Up Part 2 – Adding Major Spring Components